Showing posts with label DIY. Show all posts

DIY Room Ideas

I have done a post before called Room Ideas in which I showed you some features of my bedroom but all of those were things I bought. Today I thought I'd show you some fairly cheap DIY projects. I only have two for today but if you like them let me know because my sisters want me to do some DIY things for them so I will be doing more.

Firstly, I made this cute little decoration to hang over my desk. I bought the string which has butterflies on it and pegs from Michaels in the sale for around $1. If you can't find these, I would suggest using some wooden pegs you already have or buying some from Dollar Tree or Poundland and painting them different colours and patterns. For the string, just use normal string, lace or ribbon and cut out butterflies to stick to them with a hot glue gun.


I hung the string up with blue tac and pegged on some of my Photo Booth photos with friends and family. I just think that this is a really cute idea to decorate your room and it only cost $2 to make!


My next DIY is this really cute way to hang necklaces. I asked my little sister to find me some pebbles in the garden or you could buy some. I washed them off and used a hot glue gun to stick them to the inside of my wardrobe but you could put them on your wall too. This would also look great if you painted them first.

If you try either of these ideas and want to send me pictures then my email is pinkcupcake7blog@yahoo.com and I'd love to see them.

xoxo PinkCupcake xoxo
0

DIY: Hair Bows

Hey guys,
I've always loved hair bows but have always spent my money otherwise because lets face it, when you can choose between clothes and a bow, you'll usually choose the clothes. So I decided to try to make my own. Here's what I did!

Things You'll Need:

  • Material
  • Hot Glue Gun
  • Scissors
  • Hair Clips


 What to do:
1. First take your fabric and cut it into a square. Use whatever fabric you want your bow to be but before going out and buying some, I would recommend seeing if you have any already from previous projects or cut up some old clothing or something like that because you don't need very much.

2. No roll the fabric over until it is a long strip of fabric, the thickness that you want your bow to be. Use your hot glue gun to glue it to stay in place and cut any frayed pieces of fabric off the edges to neaten it up.

3. Now cut any material off the sides of the fabric to make it the size that you want your bow to be and fold the ends in and glue them.

4. Then pinch the middle of the fabric to scrunch it up into a bow shape.


6. Glue the middle pinched bit together so that it stays like that.


7. Now take a small section of fabric and secure it around the bow to cover the pinched middle bit. Glue it down and now your fabric should resemble a bow.

8. Finally, secure your bow to a clip or hair grip and leave the glue to set. Now your bow should be ready to use!


i hope you enjoyed this tutorial. It was very hard to explain what I was doing but you can follow the pictures and they should help. Send me pictures of your bows at pinkcupcake7blog@yahoo.com.

xoxo PinkCupcake xoxo
0

DIY: Key Decorations

Hey guys,
So today it's Friday and Friday's DIY day. I am going to show you a really cute way of decorating your boring keys. I did not come up with this, I saw it on Trusper Tips app and I really liked it so I recreated it and decided to show you today.


Things You'll Need:
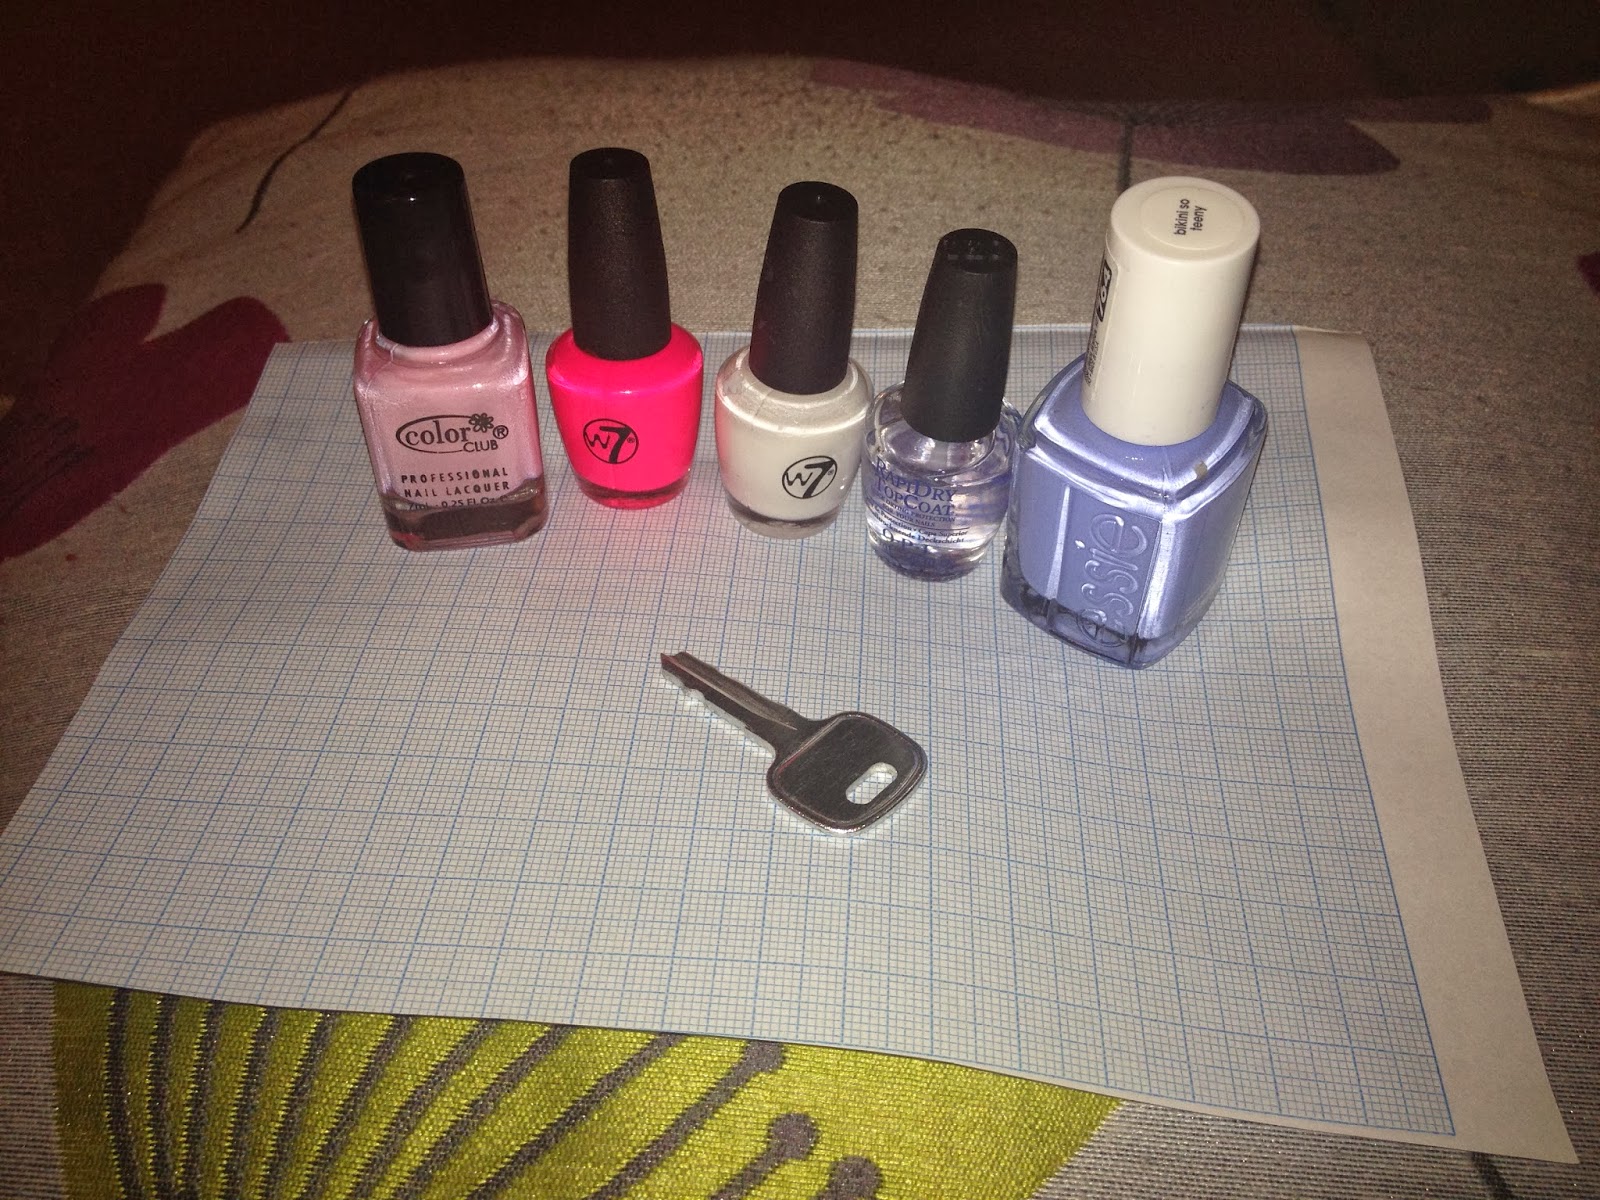
A Key
Nail Polish (Whatever colours you want your key to be)
Clear Coat Nail Polish
Small, thing paintbrush

I'm going to show you how to make the blue key above but it is pretty simple on how to change the pattern to make it how you want.

1. Clean your key. This is not a vital step (I have to be honest and say I didn't do this) but it is best to clean it.

2. Paint your key with a base colour. For me, this was bikini so teeny by Essie. Make sure the paint on the part of the key with grooves is not as thick to ensure that the key still works.


3. No paint your pattern on. I started by taking a white polish and painting messy white circles all over the key.

4. Then I took a pale pink colour and put it lightly on top of the white blobs.


5. Next I used the small paint brush to paint thin bright pink lines all over the blobs making it look like a rose.

6. Then I took a dark blue/green colour and drew leaves on the flowers. This doesn't have to be too neat, it actually tends to look better a little scruffy.


7. Now paint a sheer clear coat over the key once it's dry. I left one side to dry at a time but you can loop a grip through the hole and tape it to a desk to dry both sides. Just make sure the key is fully dry before painting the top coat otherwise the polish will smudge and the pattern will be messed up.

I hope you enjoyed this DIY tutorial and comment below if you have any DIY projects or posts you'd like to see. Thank you!

xoxo PinkCupcake xoxo
3

DIY: Makeup brush holder

Hi guys!
Today I'm going to show you how to make a cute little pot for your room. You can store lots of things in this like pens, lip balms, money but I use it to hold my makeup brushes. My best friend harrietjacksonx uses hers as a wish jar and she's done a post on how to make her wide jar so check that out, it's a great tutorial.

I used all materials that I have around the house to make this. Heres what you'll need:

  • Some kind of pot. (You can use a glass, cup, empty candle container, or I just used an empty food jar.)
  • Spray Paint (I used red spray paint but you can use whatever colour you want. I didn't have any so I borrowed some from my friend so before buying some ask around to see if someone will lend you some instead.)
  • Paper
  • Pencil
  • Tape or glue
  • Newspaper 
  • Disposable gloves or a carrier bag

1. So firstly, if your jar has a plastic label on it, soak it in hot water for 30 minutes. Then peel of scrub the label off. Then leave it to dry upside down or dry it yourself.

2. Now take some paper and draw a design on it. I drew love hearts with my paint being red but you can draw whatever pattern you'd like. Also make sure it will fit onto your jar.


3. Now cut out your design.

4. Now using tape or glue, stick it to our jar. If you are using tape, make sure your roll it into a small ball and then stick it down.

5. Next, go into a room with lots of air or outside. I went into my garage and let the air come in. I would have done it outside but it was a windy day so if you can, I would suggest doing it outside to release the fumes. Anyway, in your chosen area, lay lots of newspaper or scrap paper down and put your jar onto of it.

6. Then shake your spray paint, there should be instructions on the back informing you on how to use it correctly so follow those and spray paint your jar. Try and get the colour as evenly distributed as possible. Also make sure you cover your mouth and nose with a mask or your shirt to avoid inhaling fumes. Also I would suggest putting some disposable gloves on to avoid getting the spray paint only your hands when turning the jar or if you don't have any do like I did and put a plastic bag over your hand secured with a hair band around your wrist.


7. Now leave it to dry for as long as it says on the back of the can. For me, this was 3 hours but leave it for longer if possible just to allow it to dry completely.

8. Once your jar is dry, I fiddled around with the love hearts to make them a bit more 3D but you can change it to however you like it. Now your makeup brush holder is ready to use!


If you try this out, be sure to send me a picture at pinkcupcake7blog@yahoo.com. I would love to see how they turned out and get more ideas for the future!

xoxo PinkCupcake xoxo
1

copyright © . all rights reserved. designed by Color and Code

grid layout coding by helpblogger.com