February Favourites

Hey Guys,
So it's getting towards the end of February and so it's time for my favourites post. Most of my favourites of the month were the same as last month but I've only written about the new items so I'm sorry if it's so short. I also just wanted to mention that all the products mentioned are linked if you click on them. This will be the same for all my blog posts from now on.

1. Collection Lasting Perfection Concealer
This is a new product for me and I've absolutely loved it this month, I've used it nearly everyday. It's so creamy and gives great coverage. I'm not going to go on about it too much because I have an upcoming review on this product.

2. Real Techniques Domed Shadow Brush
Of all of my 3 Real Techniques Brushes, this brush was my least used brush until this month. I'd always used this brush for eyeshadow but this month I started using it for concealer and I absolutely love it. It blends concealer so well and makes your skin look flawless. I love it.


3. Barry M Gelly Nail Polish in Green Berry
As you know from my recent haul, I bought this nail polish because I loved the colour. it really stood out to me and it looks just as great on. This colour has been on my toenails constantly and my fingernails most weekends.


4. Benefit The POREfessional Primer
This month I decided to try the Benefit POREfessional primer which minimises the appearance of pores and I have really loved it.


5. L'Oreal Skin Perfection Moisturizer
I really needed a good quality moisturiser so I tried this one. I hadn't seen any reviews or anything so it was quite a risk but it was worth  it because this makes your skin so soft and refreshed. I'm going to be reviewing it in the next few weeks so I'll tell you more about it then.


6. Decleor Spot Treatment
I used to really love this but then I swapped products to a Neutrogena Spot Treatment and Tea Tree Oil. Recently I've gone back to it and it has cleared my skin so much.


7. Twitter
So this is slightly different to my other favourites. I have recently joined twitter and I have to say, I really love it! I have got a personal account as well as an account for PinkCupcake7 so if you want to follow that feel free. Its @pinkcupcake7_xo

Those are my favourites for this month. Please comment your favourites below or email me, I'd love to try out those too.

xoxo PinkCupcake xoxo


1

Covergirl Smoochies Review

Hey guys,
Today I'm going to be reviewing the Covergirl Smoochies. I have recently purchased 2 of them from Walgreens (see my mini beauty haul post) and decided to review them for you today.


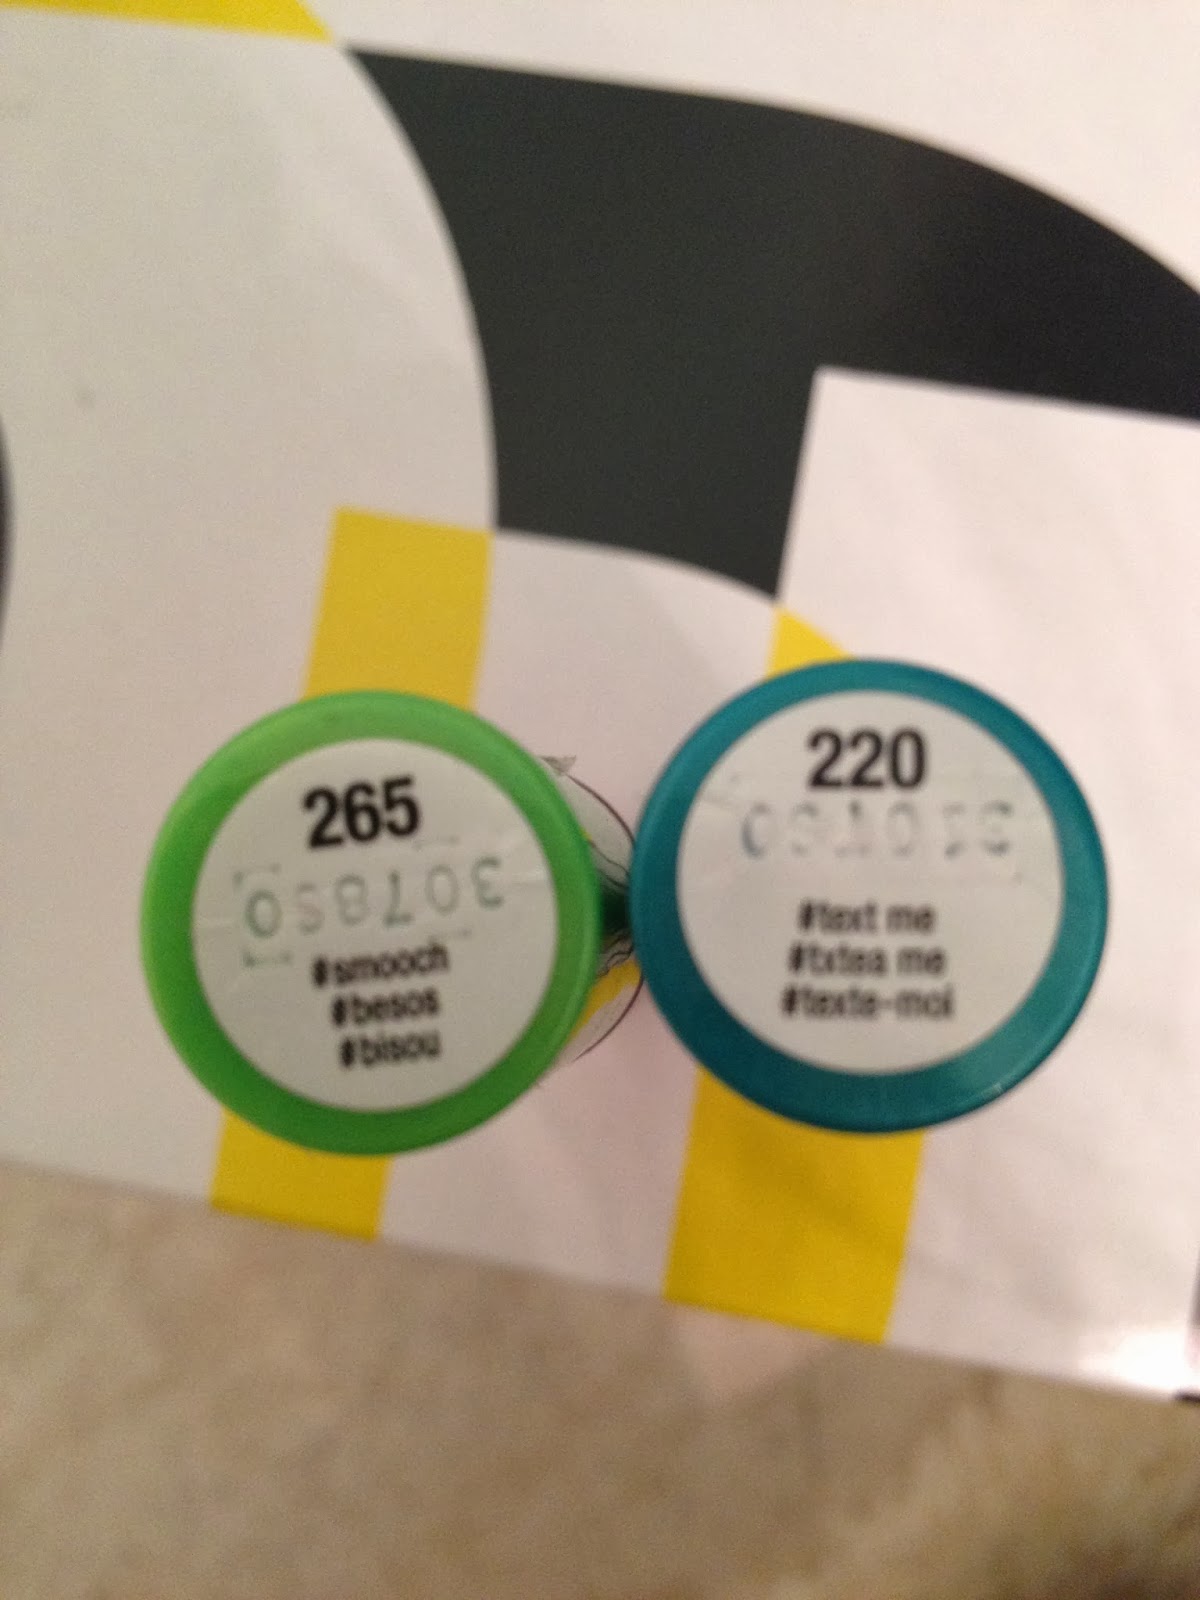
So I got them in the colours 265 smooch and 220 text me which are a light pink and deeper purpley red. These are tinted lip balms and are quite similar to Maybellines BabyLips. They are very moisturising and smell amazing, quite fruity. Covergirl is an American makeup brand so I don't think that you can purchase these in the UK but like I said the Maybelline Baby Lips are very similar. To see my review on those click here.


If you see the swatches below, you can tell that they are quite sheer which I personally like because it means that you can easily apply them throughout the day without needing a mirror. They also have a very subtle sparkle which is something that really makes this lip product stand out from others. 


I really like these lip balms and will probably buy some more. I also love the colours I bought especially 'smooch' because it looks very subtle and natural but just gives your lips a healthy looking colour. These are available in 12 colours, all of which are very pretty. I would recommend these lip balms because they're very inexpensive at only $5.99 and are good products.


xoxo PinkCupcake xoxo


1

DIY: Makeup brush holder

Hi guys!
Today I'm going to show you how to make a cute little pot for your room. You can store lots of things in this like pens, lip balms, money but I use it to hold my makeup brushes. My best friend harrietjacksonx uses hers as a wish jar and she's done a post on how to make her wide jar so check that out, it's a great tutorial.

I used all materials that I have around the house to make this. Heres what you'll need:

  • Some kind of pot. (You can use a glass, cup, empty candle container, or I just used an empty food jar.)
  • Spray Paint (I used red spray paint but you can use whatever colour you want. I didn't have any so I borrowed some from my friend so before buying some ask around to see if someone will lend you some instead.)
  • Paper
  • Pencil
  • Tape or glue
  • Newspaper 
  • Disposable gloves or a carrier bag

1. So firstly, if your jar has a plastic label on it, soak it in hot water for 30 minutes. Then peel of scrub the label off. Then leave it to dry upside down or dry it yourself.

2. Now take some paper and draw a design on it. I drew love hearts with my paint being red but you can draw whatever pattern you'd like. Also make sure it will fit onto your jar.


3. Now cut out your design.

4. Now using tape or glue, stick it to our jar. If you are using tape, make sure your roll it into a small ball and then stick it down.

5. Next, go into a room with lots of air or outside. I went into my garage and let the air come in. I would have done it outside but it was a windy day so if you can, I would suggest doing it outside to release the fumes. Anyway, in your chosen area, lay lots of newspaper or scrap paper down and put your jar onto of it.

6. Then shake your spray paint, there should be instructions on the back informing you on how to use it correctly so follow those and spray paint your jar. Try and get the colour as evenly distributed as possible. Also make sure you cover your mouth and nose with a mask or your shirt to avoid inhaling fumes. Also I would suggest putting some disposable gloves on to avoid getting the spray paint only your hands when turning the jar or if you don't have any do like I did and put a plastic bag over your hand secured with a hair band around your wrist.


7. Now leave it to dry for as long as it says on the back of the can. For me, this was 3 hours but leave it for longer if possible just to allow it to dry completely.

8. Once your jar is dry, I fiddled around with the love hearts to make them a bit more 3D but you can change it to however you like it. Now your makeup brush holder is ready to use!


If you try this out, be sure to send me a picture at pinkcupcake7blog@yahoo.com. I would love to see how they turned out and get more ideas for the future!

xoxo PinkCupcake xoxo
1

Real Techniques Makeup Brushes Review

Hi guys,

Today I'm going to be reviewing the Real techniques makeup brushes as you can see from the title. I got 3 of these brushes for Christmas and really have been enjoying them so I thought I'd share with you what I like and dislike about the products.


I really like all 3 of these brushes. They all make it extremely easy to apply your makeup well, picking up the right amount of products and blending it very well. I use the foundation brush to blend in concealer and for liquid foundation because I find that it gives you flawless coverage. Personally, I think that the product you use with these brushes doesn't matter as much because they make it look great anyway. A concealer that I had never thought gave great coverage, suddenly turned into my go-to concealer once I started to use these brushes.

The only down-side is that when I got these brushes, the foundation brush actually shed a lot of bristles. When I first started using it, bristles would just fall out and often get caught up in my foundation. This is a minor thing because it doesn't seem to happen anymore, only the first couple of times I used it. Despite this flaw, I would still buy this brush again because it is great quality. I also look forward to getting more and building my collection of these brushes.

xoxo PinkCupcake xoxo

5

How To: Making your own Lip Exfoliator/Lip Scrub

Hey guys,
So you may have seen my 'How To: Making your own BB cream' post not too long ago. Well, I really enjoyed making that post so I decided to make another DIY makeup products post today. I find that making your own products from ingredients that you already have in your house is a much cheaper way of getting new products. Today I'm going to be showing you how to make a lip exfoliator.


Things You'll Need:
  • Olive Oil
  • Sugar or Caster Sugar
  • Honey
  • Vanilla Essence (optional)
  • Food Colouring (optional)
  • Measuring spoons
  • Jar to keep it in

1. Firstly, take the jar that you are going to keep your lip exfoliator in and put a tablespoon of caster sugar or sugar into the jar. If you want a deeper lip scrub then use normal sugar but caster sugar is generally softer to the lips. This will make your lips smooth and exfoliate them. You can obviously add more or less depending on how much you want to make but I find that using this much makes a good amount.

2. Then add 1/2 - 3/4 of a teaspoon of olive oil. This isn't a set amount, I find that after I've stirred it, I end up adding a little more to make it of a better consistency but this is up to you. Stir the mixture and it shouldn't look to liquidy, it should be more like sugar at this point.


3. Now add a small amount of honey. This is really a trial and error thing with the amount because the honey makes the mixture stick. Just add a small dribble and then work from that until the mixture is stuck together. 

4. Now the next step is optional. You could just leave the lip scrub like that or you can add flavouring. Personally, I prefer to add some vanilla essence to make it taste a little better because after all, you are putting it on your lips. You can also add peppermint extract, lemon juice or anything thats going to add flavour to your exfoliator. Don't add very much, only a few drops because you want to make the flavouring very subtle.

5. This step is optional too. If you want to, you can add food colouring to make your lip scrub tinted and leave a nice colour to your lips or you can leave it natural. I added some red food colouring to make it tinted. I would only use red or pink food colouring but it is up to you. Don't overdo this step, only add a couple of drops because food colouring does stain and you don't want to overly stain your lips. I only added a few drops to make it a rosy pink but then I added some more to make it a slightly darker pink colour.


6. Now your lip scrub is ready to use. If after a while, your scrubs mixture begins to separate, put in in a fridge and it should stick back together. Also since you have used all edible ingredients, once you've finished exfoliating your lips, you can lick it off, that is why I like to add flavouring.


Thank you for reading! If you having any tips on making this or want to tell me how this worked for you please comment below or email me. Thanks!

xoxo PinkCupcake xoxo
3

BabyLiss Curl Secret Review

Hey guys,
Today I'm going to be reviewing the BabyLiss Curl Secret which I got for Christmas.

The first time I tried this, I did everything it said to and my curl was virtually none existent. It didn't curl my hair at all and didn't work very well. I then tried it with a bigger piece of hair because emu hair is very fine and the same, it didn't work well. I gave it chance to heat up for longer, changed the amount of time it was in for and it still didn't work well.


Then I tried it again and my hair got caught! This was my own fault because I probably didn't insert my hair in the correct bit. This is a disadvantage for me because it is very difficult to know at the back of your head which part of the curlers you are putting your hair into. I left it for the day disappointed in the product.

Then I went back to it the following day and tried it with a smaller section of hair. It says to use 3cm of hair which is what I was doing before but instead I used a much smaller amount this day. It did work a lot better which was great but took a long time to curl all of my hair because I had to use such a small amount.

Overall, I would recommend this if you always have lots of time to get ready but if you like to get ready fast and are often rushed for time, I would not recommend buying this because it is a lot of money and you probably wouldn't get the opportunity to use it very often.

xoxo PinkCupcake xoxo

5

January Favourites

Hey guys,
So with it being the end of January, I thought I'd tell you what have been my favourite products of this month!

1. Neutrogena Acne Treatment
If you've read all of my posts the month, you'll know that I went on a small beauty haul to Walgreens and purchased this spot treatment. I love the cleanser in this range so was excited to give this a try. I really love this treatment, you can apply it to fade past breakouts, clear present breakouts and prevent future breakouts so I apply it every morning after I've had a shower. You only use a 'light coverage' so it lasts a long time and if you immediately treat a breakout with this, I find that it goes very quickly.


2. Fresh Minerals Powder Foundation
I really have been loving this powder foundation this month. I have used it most days because I find that it looks extremely natural. It doesn't give very much coverage but I use it to correct my skin tone and then you can use additional concealer if you need more coverage. I just think this really does give you a glow and makes you look fresh.


3. Covergirl Smoochies
I also recently bought these in my small beauty haul. I bought them in 2 colours, a reddish purple and s girly pink. These lip balms are really moisturising and smell really nice too. They are a bit like Maybellines BabyLips but they they give lot more colour than BabyLips. I especially love the pink one, its in the colour Text Me which is the pink, it has a little sparkle to it and I love the way it looks.

4. Lip Vitamins Lip Balm
I got two of these for Christmas in 2012 and if I'm honest they were just put away in my drawer and not touched but recently I've found them and have been loving them. I have them in Honey and Mango, I especially love the Honey one, they are very moisturising and I really love them.


5. Essie Nail Polish in Bikini So Feeny
I am still at school and am not allowed to wear nail polish for school so at weekends I take the opportunity to paint them. Every Weekend throughout January I have chosen the same colour by Essie, Bikini So Feeny. It's a blue colour and I love it.


6. Christmas Cookie Yankee Candle
I got this candle for Christmas and it smells so nice. It's quite a sweet smell but it is so nice! I lit it and it made my whole bedroom smell amazing. It also lasts a really long time, if you keep it lit, it lasts a total of 4 hours before burning out.

7. Bath and Body Works Japenese Cherry Blossom body spray
I bought this in the January sales for $3 <a great bargain. This body spray smells so good, it is one of my favourite scents and I get so many compliments whilst wearing it. 


8. Tea Tree Oil
I bought this spot corrector from boots but when I got home, I realised that really, it was just tea tree oil. 
I have been using this product since around Christmas and I forget how much it helps my skin! I find that out of all my acne treatments, cleansers and moisturisers, tea tree oil works best for me. I also have some from The Body Shop which is more of a cream than liquid but that works great too. Tea tree oil in general is just a must for me.

These are just some of the products I've been loving this month and I would recommend all of them.

xoxo PinkCupcake xoxo

1

How to: Making your own BB cream

So for all you makeup horders out there, this will be a great post for you. I myself, love to collect makeup but buying a lot becomes very hard when you only have so much money. I've desperately been wanting a good BB cream to use because I don't feel my skin needs a foundation as I am only a teenager and don't want to use too many products on my skin everyday. My skin has also been very dry recently and I thought that a tinted moisturiser or BB cream (Beauty Balm) would help it but like I said, one wasn't in the budget so I decided to use products I already had to make my own.

Things You'll Need:
Moisturiser
Primer (optional)
Suncream (optional)
Foundation
Makeup Brush or sponge

1. So if you're wanting to make a large portion of BB cream at one time, I would suggest getting a small pot or container to keep it in but in my case, I just like to make a little amount each day on the back of my hand, either works fine. First you'll need to put some primer in the pot or on your hand. I used Rimmel's Fix and perfect primer. The amount depends on how much you want to make but remember not to use too much primers it doesn't need to consist of much primer, just enough to keep the BB cream on your skin all day.

2. Now add some sun cream. Because I used Simple's Protecting Moisturiser, I didn't need to add sun cream but if yours doesn't I would recommend adding some. This step isn't crucial but most BB creams tend to have sun cream in them. You don't need a lot of this either.


3. Now add your moisturiser. Like I said before, I used Simple's Protecting Moisturiser but any moisturiser that works for you will be fine. Your BB cream will consist of mainly moisturiser and foundation so you should use more of this product than the previous ones but still not as much as your foundation. Using too much moisturiser can make your BB cream look bad on your skin.

4. Now take your foundation. It is often enter to use a foundation that is a shade darker than your skin tone because the moisturiser can make it lighter but if you for have any darker foundation then using your normal shade should work fine. I used Rimmel's True Match Foundation in the colour Classic Ivory. You'll need to add the most of this foundation because the BB cream should mainly be foundation. I used one full pump which lasts me one full use but if you're making enough to last longer then you'll obviously need to use more.


5. The final step is to blend all of the products together. If you made the BB cream on the back of your hand, use a makeup brush or I used my Beauty Blender in a pat and twist motion to blend the products together but if you are making it in a pot, I would suggest using a spoon, stick or the end of a makeup brush to blend it. After that, you should have a BB cream ready to use but you can change the cream by adding more products to how you like it.


I hope you enjoyed this tutorial. It is obviously easier to buy a BB cream but I think that this DIY trick is a nice way to save money and use up products that are sitting at the back of your cupboard. If you have any makeup tips or requests of posts you'd like me to do in the future, please comment below or email me at: PinkCupcake7blog@yahoo.com. Also let me know if you like these types of posts and I'l do more in the future.

Xoxo PinkCupcake xoxo
3

Maybelline Colour Sensational Lipstick Review

Hi guys!
Today I'm going to be reviewing the Maybelline Colour Sensational Lipsticks.


I bought one of these just because I wanted a bright lipstick and the colour of one in the range jumped out at me. I bought it in 900 Hot Plum which is a really bright purple colour. After using it, I found that it was a really good lipstick and was glad I bought that one. It was super pigmented and looked great on your lips. I thought it could just be a fluke like my Rimmel Kate Moss lipstick was so I did not purchase any more.


Then for christmas I received two more of these lipsticks in 895 On Fire Red and 870 Shocking Coral. I really like both colours, they're quite bright but I find that if you blot it with a tissue, the colour fades for a more subtle look. These lipsticks stay on for ages! I swatched them on the back of my hand Christmas morning and they stayed on for a good few days after.


The only thing that I would change about these products would be the packaging because they look quite cheap. The way they are see through and kind of tacky. It's nothing to do with the product itself and it's really picky but if I had to say something, thats what I would change.


Overall, I would highly recommend these lipsticks. If I ever need a new lipstick, I automatically go to this range. These are my favourite drugstore lipsticks.

xoxo PinkCupcake xoxo

5

copyright © . all rights reserved. designed by Color and Code

grid layout coding by helpblogger.com